installation


Extract the downloaded OBEROn Platform zip file with the latest OBEROn release into a folder on a server or a client machine.
You can find the following scripts:

- startdesign runs the Enterprise Context Design client
- startobjects runs the Domain Object Manipulatiion client
- startclient runs a Desktop Application (SWT) client
- ooql opens the command line console
- rmistart1079, rmistart1089 .. start the OBEROn RMI server on port 1079,1089 ..

- install runs the OBEROn Installer (build >=0053)

The previous applications don't work until the underground database is not installed and configured; you can choose to:

- install on a MySQL database
- install on an Oracle database
- install on an PostgreSQL database


MySQL Installation


- Install the MySQL server

Download and install MySql 5.1.* or a more recent version. [ MySQL 5.0.* is also supported ]
After the Wizard completed the installation, configure the server as follow:


choose the detailed configuration


select the server type depending on the performance requirements


set the InnoDB tablespace installation Path (the location for the database data)


set the number of concurrent connections to the server:
if the server is used for the production purpose choose the OLTP type
otherwise should be sufficient the OLAP option.


set the networking options: if it is necessary, you can change the port number
and open the firewall for this port


select the UTF8 character set (support for multilingualism)


set the Windows service options


set the root password

- Create the OBEROn schema

Using the MySQL Administrator (included into the MySQL Tools for 5.0) create a new database schema named OBEROn:


run the INSTALLATION wizard.

NOTE: for better performances set: innodb_flush_log_at_trx_commit=2 in the mysql conf file (my.ini)


Oracle Installation


- Install the Oracle server    

With the Oracle Database Configuration Assistant create a new database which support the UTF8 character set (for multilingualism). You can use also an already defined database with the same character set. Add new TNSNAME for your Oracle server and client (set the SID with the same name of the database you've already created)

- Install the Oracle client    

The Oracle client is required for OBEROn installation with OCI driver. You can avoid to install the client but, in this case, you need to download the DLL / SO libraries for JDBC connection, according to your system operator and put them inside the java library path.

run the INSTALLATION wizard.    


PostgreSQL Installation


- Install the PostgreSQL server

Download and install PostgreSql 9.0.6 or a more recent version.

- Create the OBEROn database

Using the pgAdmin console create a new database named OBEROn setting Encoding=UTF8 in the Definition tab:


run the INSTALLATION wizard.


INSTALLATION WIZARD

This tool is available from the release 2.0 build 0053 and you can start it by running the install.bat (or .sh) script.

[NOTE: this script launches a java class, you need Java (JRE/JDK) 1.6 or greater installed; if the java command is not in the system PATH, please edit the install script and set the absolute path for the java command]

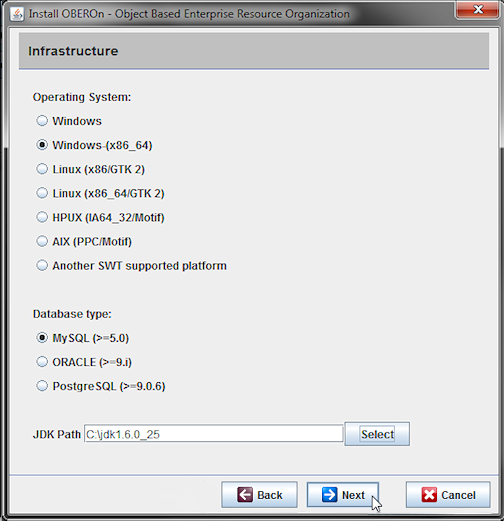
Set the Operating System (OS), the database type and the Java Development Kit (JDK) home path - OBEROn requires the JDK 1.6 or greater.

If you select "Another SWT supported platform", download the SWT Binary libraries from the Eclipse SWT official web-site and and put the swt.jar only into the ./lib/swt/other folder.
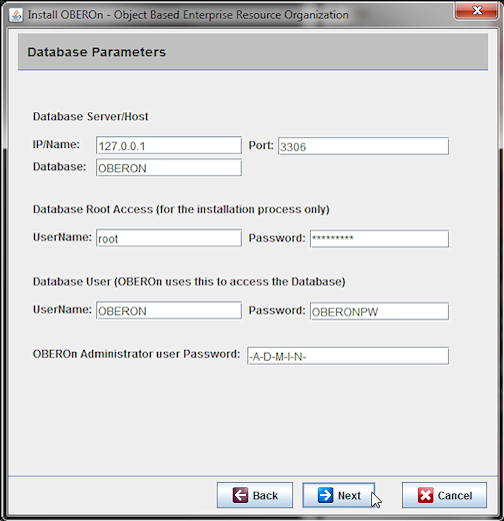
Compile the Database Parameters:

- Oracle: the database name is also the TNSNAME (SID) defined in the tnsnames.ora
- MySQL: the database name is the schema name previously created
- PostgreSQL: the name of the database previously created

The tablespace datafile (TS Datafile) is optional and represents the datafile for creating the OBEROn administration tablespace [default is OBADMIN.DBF]
Note: MySQL 5.0 and PostgreSQL for Windows don't support tablespaces.

The install script connects to the database with an administration access during the installation process, in details:
- Oracle: set the "sys@sysdba" user account
- MySQL: set the "root" user account
- PostgreSQL: set the "postgres" user account

A new user will be created for all the next operations with full access on the OBEROn DB/Schema.
Finally you have to set a password for the first OBEROn user (ADMIN); this user will allow you to create more administration/application users inside the OBEROn Platform.

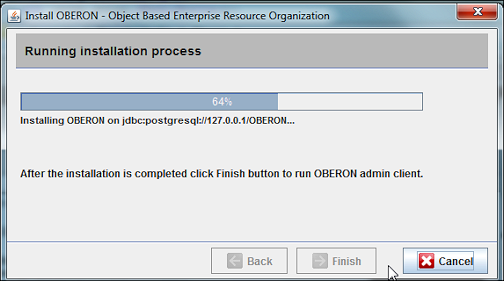
If you click "Next" the installer will start the installation process:

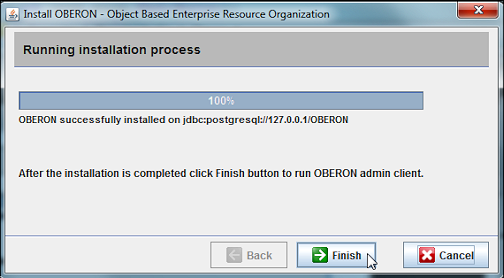
Wait until the confirm message appears at the end; click Finish button to execute the OBEROn Enterprise Context Design administration client.

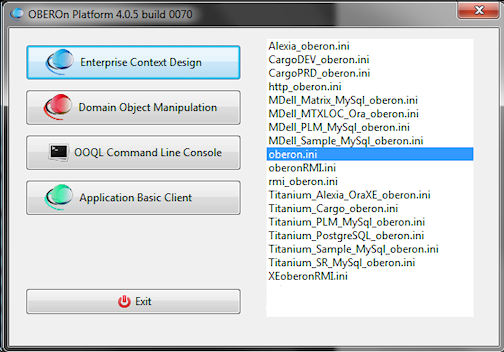
The installation process updates the config.bat and etc/oberon.ini files according to the installation options (operating system, database drivers, jdk path, connection account, etc.); you can find in etc/oberon.ini file the two parameters uid=ADMIN and pwd=<the ADMIN user password> ; you may change them, after you create new OBEROn users, to directly access to the Enterprise Context Design or to the other clients without a login.

Copy the oberon.ini file and rename to ***_oberon.ini in the etc folder to keep a backup of your current configuration; the oberon.bat (.sh) allows you to select from different ***_oberon.ini files in the etc folder before execute the Enterprise Context Design client (startdesign.xx), the Domain Object Manipulation client (startobjects.xx), the OOQL console (ooql.xx) or the OBEROn application client (startclient.xx).

Note: oberon.bat(.sh) overwrites the current oberon.ini with the selected configuration file.


© 2008-2015 MS Enterprise Solutions | Website Templates by IceTemplates.com
Please Read: Privacy Policy and Terms of Use